A localization project can become complex quickly by undergoing constant changes in translations, workflows, and team composition. With the continuous development lifecycle across multiple team members, there is a potential for errors. New team members are not familiar with tools yet and accidentally overwrite translations, languages deleted in the heat of the moment, miscommunication leads to a reset of translation workflows or some technical error in the process can lead to the wrong translations in the wrong place.
To rectify possible errors in a GlobalLink Strings project, users have two options to can revert whatever might go wrong: Automatic Backups and Manual Backups. Automatic backups are created once a day whenever there are changes made to a project. Manual backups can be created by a user with the Admin user role at any time.
Table of Contents
- How to create a backup
- How to import a backup
- How to download a backup for a specific language
How to create a backup
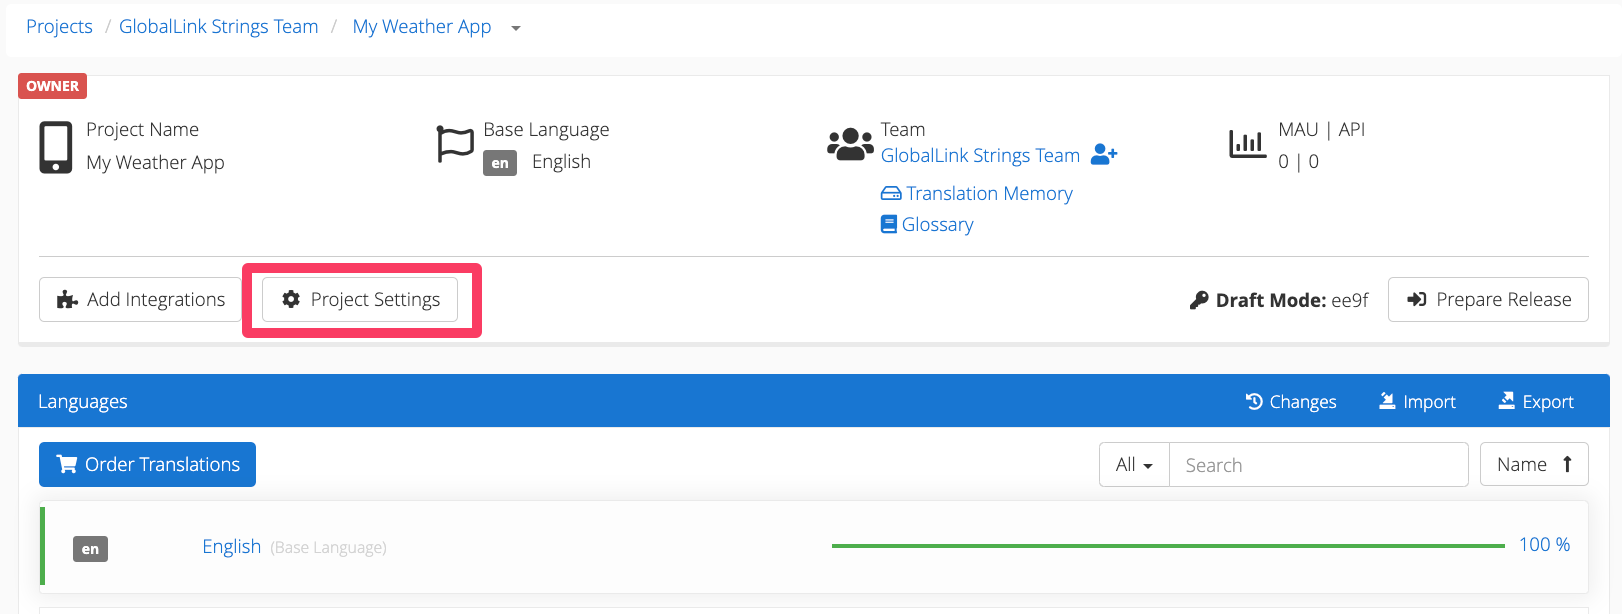
- Open the Project Settings
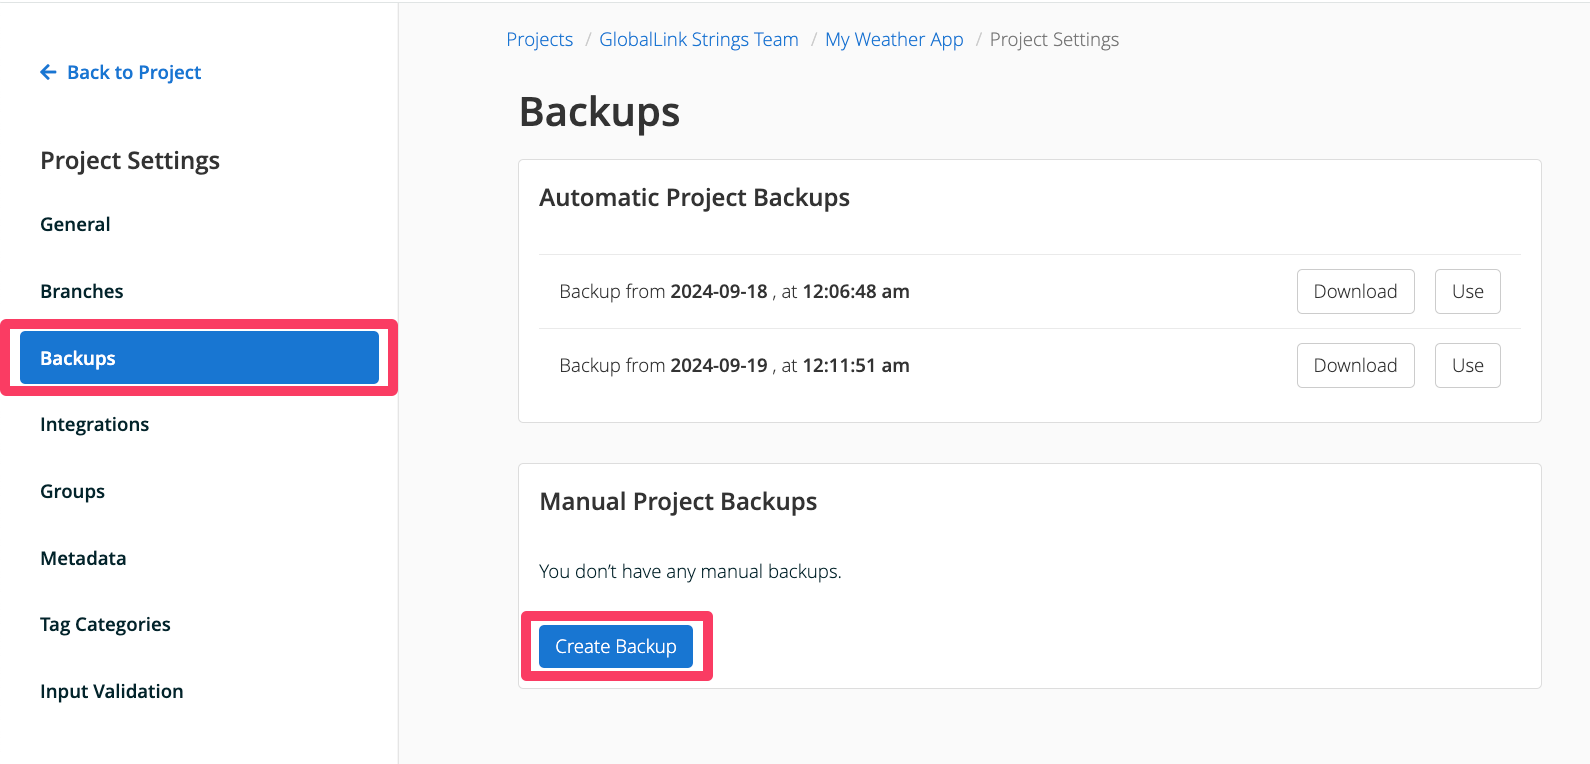
- Navigate to the Backups tab then click Create Backup
Back to Top
How to import a backup
- Open the Project Settings

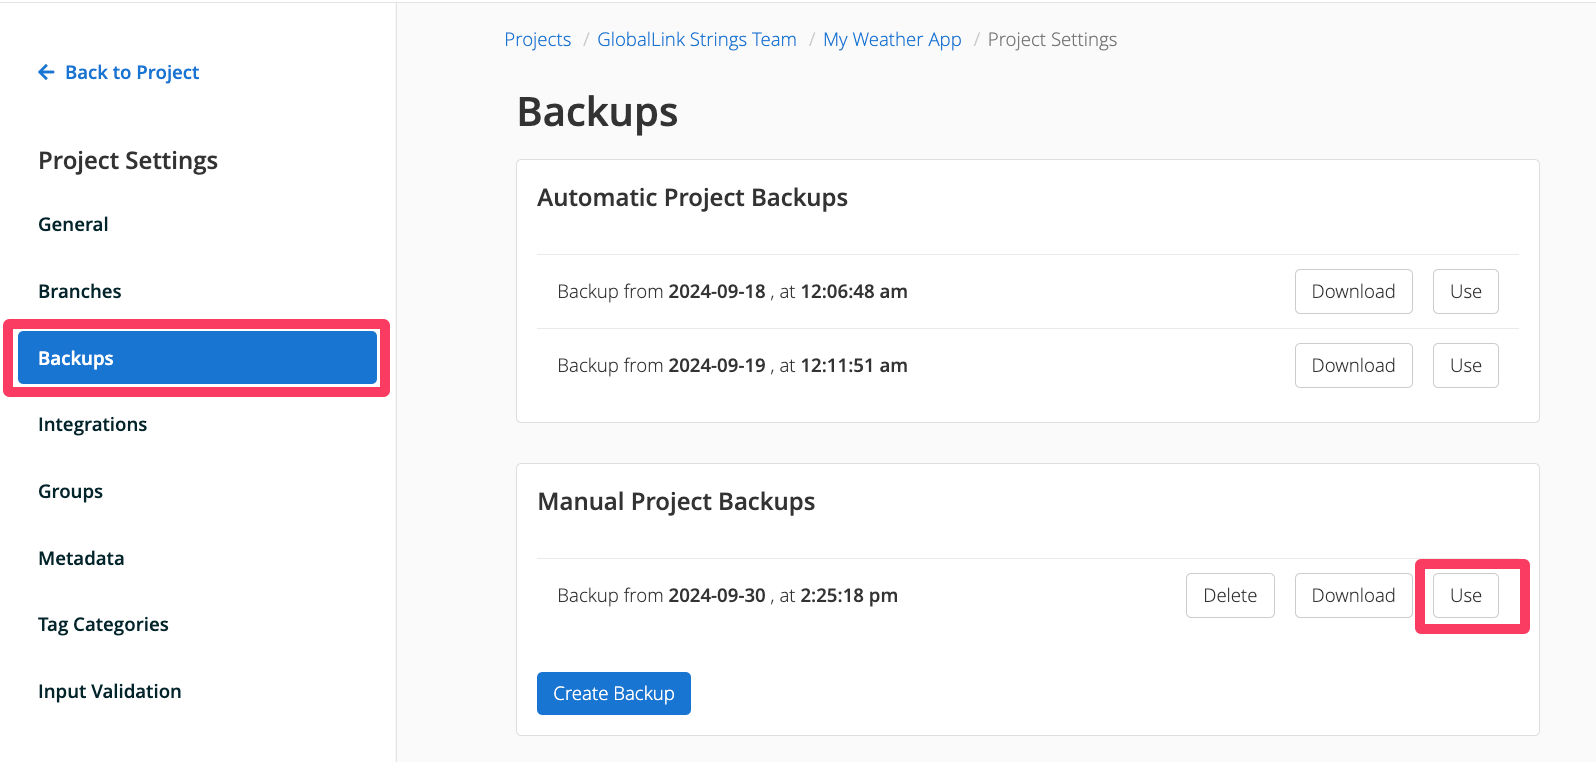
- Navigate to the Backups tab, then click Import next to the backup you wish to import back into the project
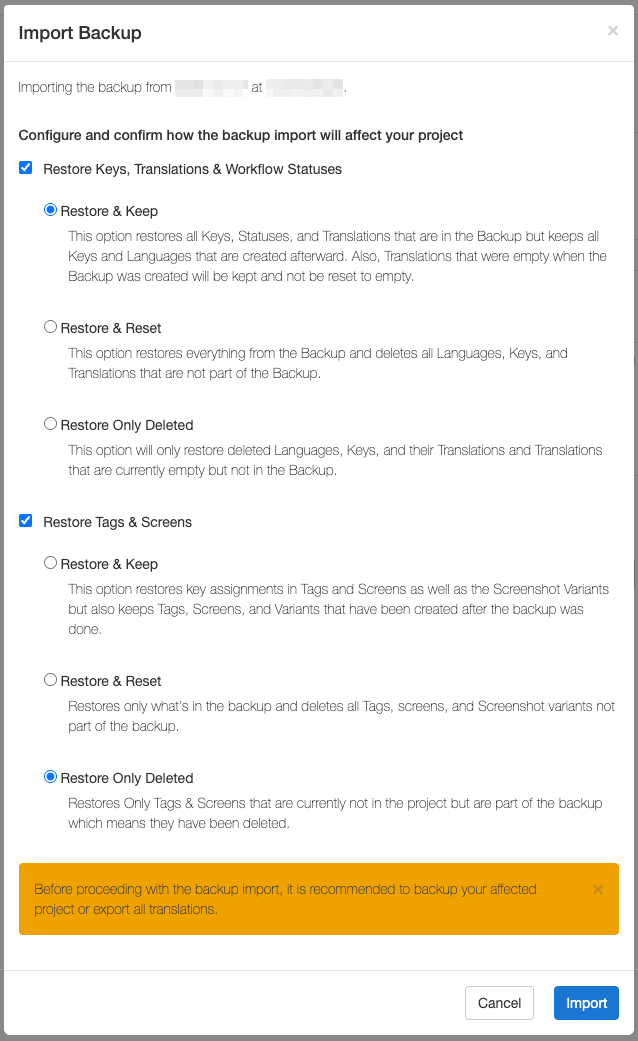
- On the Import Backup dialog, select the elements that you wish to restore:
- Keys, Translations & Workflow Statuses:
- Restore & Keep: all keys, translations and workflow statuses from the backup will be imported into the project without deleting any of these existing ones from the project.
- Restore & Reset: all keys, translations and workflow statuses from the backup will be imported into the project, and all existing ones in the project will be deleted.
- Restore Only Deleted: restores only keys, translations or workflow statuses that were deleted from the project.
- Tags & Screens
- Restore & Keep: this option restores the key-tag and key-screen association (including screenshot variants). Additionally, it keeps the existing screens, screenshot variants and tags from the project.
- Restore & Reset: this option restores the key-tag and key-screen association (including screenshot variants) and removes the existing screens, screenshot variants and tags.
- Restore Only Deleted: this option restores the screens and tags that have been deleted from the project and are included in the backup.
Back to Top
How to download a backup for a specific language
This option allows users to be selective about which language a backup applies to. Please note that importing a backup for a specific language will reset the translations and their workflow status and their locked/unlocked status.
- Open the Project Settings

- Navigate to the Backups tab then click Download
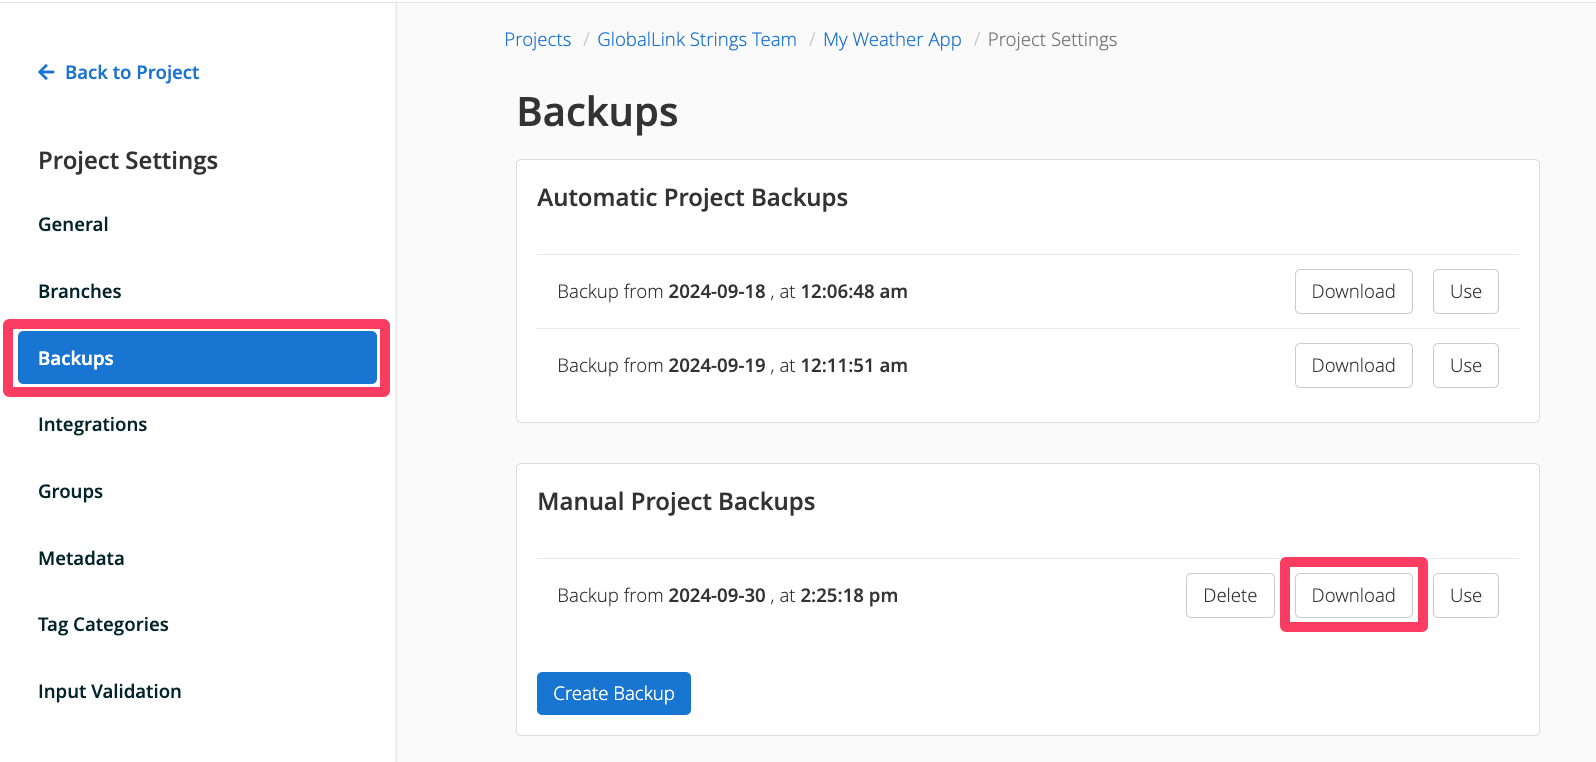
- Click Download under the specific language(s) which require a backup
- To apply the language specific backup, go back to the project dashboard. On the Languages panel, click on the language you wish to restore to access the Editor view.
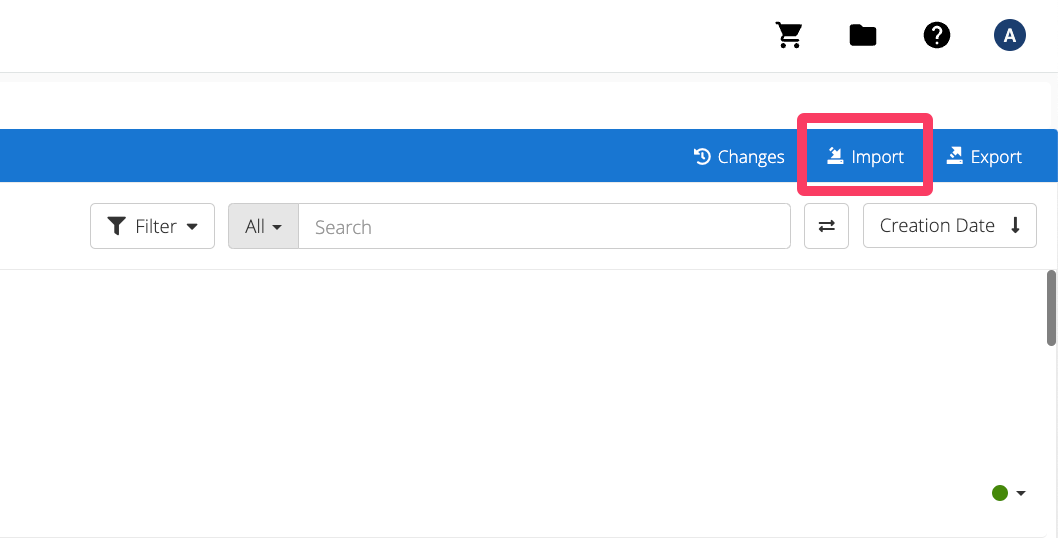
- From the editor view, click on the Import button at the top right corner
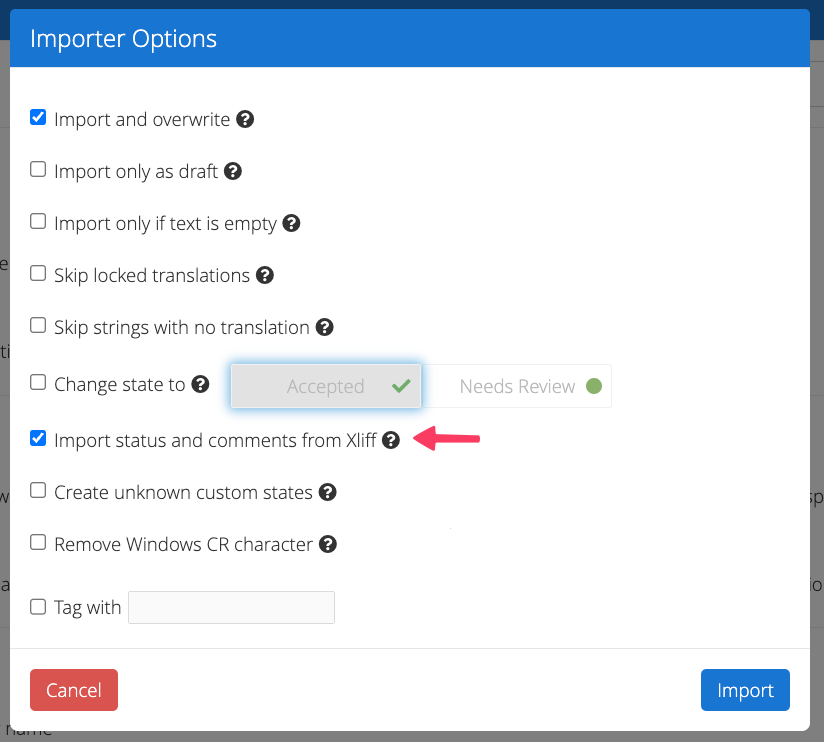
- On the Importer Options pop-up, select the Import and overwrite and Import status and comments from Xliff options
Back to Top


